
This is an old revision of the document!
Table of Contents

|
Location: Room P3-A-10 ( |
 Zeiss LSM 710 Booking
 Zeiss LSM 710 Usage Statistics
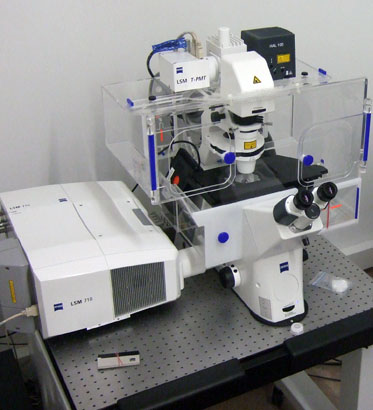
Microscope overview
 The Zeiss LSM 710 is a confocal point-scanning microscope able to generate high-resolution three-dimensional images of thick specimens with high sensitivity and low photodamage. It is an inverted microscope specially suitable for live cell imaging and photobleaching experiments, equipped with a large size incubator for temperature control (but no stage incubator for CO2 supply). Its scanning unit has a spectral recycling loop, two sensitive PMT detectors and a filter-free spectral separation module that can be continuously set over the entire wavelength range (i.e. you can specify which wavelength range you want to detect). It is equipped with lasers from violet to far red (405, 458, 488, 514, 561 and 633 nm excitation wavelengths). With this system you can perform optical sectioning of fluorescent samples which are too thick for a widefield system such as the Zeiss Cell Observer WF or the Zeiss Axiovert 200M. Image resolution and detection sensitivity are higher than faster confocal systems such as the spinning disk 3i Marianas SDC or the Zeiss LSM 7 Live, but image acquisition is slower. If you need to use a 594 nm laser or increased resolution and sensitivity, or are performing long time-lapse experiments in live samples (aqueous media) and need hardware focus control, check the Zeiss LSM 880 confocal point-scanning system with Airyscan and Definite Focus. If your personal computer cannot handle all the data you collected, check out the Big Guy or Colossus.
 Click on the image on the left to see the system beam path in higher detail
Booking Rules
The Zeiss LSM 710 booking is divided in three daily slots:
| 9:00 to 13:00 | 13:00 to 17:00 | 17:00 to 21:00 |
- A user can book at maximum 2 sessions per week
- Each session must fit inside one of the three daily slots (i.e. a session booked from 11:00 to 14:00 counts as 2 sessions)
- The above rules do not apply for weekends and for work days before 9:00 and after 21:00
- The above rules do not apply for sessions booked on the very same day or 24 hours ahead
- Exceptions to these rules require approval from José Rino.
- Users must indicate which lasers they are going to use in the booking Description field
- Users must indicate if they will use the incubator in the booking Description field (write down 37C INCUBATOR)
- Users must write their internal extension phone number in the booking Description field
System components
LASERs
| Laser Unit | Wavelength | Maximum Power | Current Status |
|---|---|---|---|
| Diode 405-30 | 405 nm | 30 mW | ok |
| Argon | 458, 488 and 514 nm | 25 mW | ok |
| DPSS 561-10 | 561 nm | 15 mW | ok |
| HeNe633 | 633 nm | 5 mW | ok |
Objectives
| Magnification | Model | Type | NA | WD (mm) |
|---|---|---|---|---|
| 10x | EC Plan-Neofluar | Dry | 0.30 | 5.2 |
| 20x | Plan-Apochromat | Dry | 0.80 | 0.55 |
| 40x | EC Plan-Neofluar | Oil | 1.30 | 0.20 |
| 63x | Plan-Apochromat | Oil | 1.40 | 0.19 |
Upon request:
| Magnification | Model | Type | NA | WD (mm) |
|---|---|---|---|---|
| 25x | LCI Plan-NeoFluar | Oil/Glyc/W | 0.8 | 0.21 |
| 100x | Plan-Apochromat | Oil | 1.40 | 0.17 |
Filtersets (Ocular)
Microscope Turn On Procedure
- Turn on the
MAIN SWITCH - Turn on the two switches:
SYSTEMS/PCandCOMPONENTS

- Turn the metal halide power source on (if needed)

- Turn the Ar laser on using the key (if needed)

- Turn the computer on
- Login with your unit account
- Wait for network icon to change to
connectedstate - Switch the Ar laser from
idletonrun(don't change thecurrent)

- Start the ZEN 2012 software
Microscope Turn Off Procedure
If there's another user for this microscope in the next hour:
- Close the software, leave the lasers on and log off the computer.
- Clean up any objective where you used immersion oil.
- Make sure that there really is another user going to use the microscope.
Else:
- Turn off the 561 nm laser and incubator in the software (if used)
- Switch the Ar laser from
runtoidle(if used) - Turn off the Ar laser using the key (if used)
- Clean up any objective were you used immersion oil.
- Exit the software, shut down the computer.
- Turn off the metal halide lamp
- Turn off the main switches
SYSTEMS/PCandCOMPONENTS - Wait 5 min. for Ar laser cooldown
- Turn off the
MAIN SWITCH.