Location: [Oeiras] Room 0B16
Manufacturer: Agilent
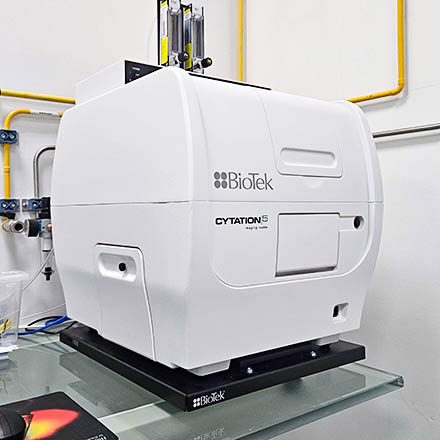
Model: BioTek Cytation 5 Cell Imaging Multimode Reader
Nickname: Cytation 5
Software: Gen 5 Image Prime
Year: 2024
SN: JDGD GHWD HGWM KH
 
Data will be deleted after: 1 month  
 
Agilent Cytation 5 Quality Control
Agilent Cytation 5 Usage Statistics

===== Microscope overview ===== The Cytation 5 Cell Imaging Multimode Reader is a fully automated plate and slide reader equipped with an inverted widefield configuration. This unit is capable of imaging from 4-40x with fluorescence and/or brightfield (mono or RGB). It is equipped with three different excitation LEDs and filter sets (there is a fourth slot which is mainly used for hardware-based autofocus, but which can be replaced by a 4th fluorescence channel upon request). It is also equipped with an atmosphere control unit for regulating CO2 concentration (for live cell imaging), and capable of setting up for hypoxia conditions also. The multimode detection modules include filter- and monochromator-based fluorescence detection, luminescence, and UV-Vis absorbance detection. ===== Filtersets available ===== ^ Default Config ^ Filterset ^ Filterset Reference ^ LED wavelength (nm) ^ LED reference ^ Excitation (nm) ^ Dichroic (nm) ^ Emission (nm) ^ | Pos 1 | Laser Autofocus | [[https://www.agilent.com/store/productDetail.jsp?catalogId=1225010&catId=SubCat2ECS_2041516|1225010]] | - | - | - | - | - | | Pos 2 | DAPI | [[https://www.agilent.com/store/en_US/Prod-1225100/1225100|1225100]] | 365 | 1225007 | 377/50 | 409 | 447/60 | | - | GFP | [[https://www.agilent.com/store/en_US/Prod-1225101/1225101|1225101]] | 465 | 1225001 | 469/35 | 497 | 525/39 | | Pos 3 | Propidium Iodide | [[https://www.agilent.com/store/en_US/Prod-1225111/1225111|1225111]] | 523 | 1225003 | 531/40 | 605 | 647/57 | | - | Texas Red | [[https://www.agilent.com/store/en_US/Prod-1225102/1225102|1225102]] | 590 | 1225002 | 586/15 | 605 | 647/57 | | Pos 4 | Cy5 | [[https://www.agilent.com/store/en_US/Prod-1225105/|1225105]] | 623 | 1225005 | 628/40 | 660 | 685/40 | ===== Objectives ===== ^ Magnification ^ Model ^ Immersion ^ NA ^ WD (mm) ^ Reference ^ | 4x | Plan-Semiapochromat Fluorescence | Air | 0.13 | 17 | [[https://www.olympus-lifescience.com/en/objective-finder/#!objective=511706528|UPLFLN4X]] | | 20x | Plan-Semiapochromat Fluorescence | Air | 0.45 | 6.60-7.80 | [[https://www.olympus-lifescience.com/en/objective-finder/#!objective=511706550|LUCPLFLN20X]] | | 40x | Plan-Semiapochromat Fluorescence | Air | 0.6 | 2.70-4.00 | [[https://www.olympus-lifescience.com/en/objective-finder/#!objective=511706551|LUCPLFLN40X]] | ===== Camera ===== ^ Model ^ Frame Size ^ Pixel Size (µm) ^ Quantum Efficiency ^ | [[https://www.teledynevisionsolutions.com/products/chameleon3-usb3/?model=CM3-U3-50S5M-CS&vertical=machine%20vision&segment=iis|FLIR Chameleon3 CM3-U3-50S5M (mono)]] | 2448 × 2048 | 3.45 x 3.45 | 69% (at 525 nm) | ===== Pixel Size ===== Images coming from the Cytation 5 are not calibrated, even though the system has that information available. In the images' metadata you can find the PixelWidth and the ImageWidthMicrons, and by dividing the latter for the first, you get the Pixel Size to calibrate your images. You can find this information below, per objective and Field Of View (FOV): ^ Objective ^ FOV ^ Image Size (pixels) ^ Image Size (microns) ^ Pixel Size (microns) ^ | 4x | Full | 1992 x 1992 | 3474 x 3474 | ~1.7440 x ~1.7440 | | 4x | 75% | 1496 x 1496 | 2609 x 2609 | ~1.7440 x ~1.7440 | | 4x | Standard | 1224 x 904 | 2135 x 1576 | ~1.7443 x ~1.7434 | | 20x | Full | 1992 x 1992 | 694 x 694 | ~0.3484 x ~0.3484 | | 20x | 75% | 1496 x 1496 | 521 x 521 | ~0.3483 x ~0.3483 | | 20x | Standard | 1224 x 904 | 427 x 315 | ~0.3489 x ~0.3485 | | 40x | Full | 1992 x 1992 | 347 x 347 | ~0.1742 x ~0.1742 | | 40x | 75% | 1496 x 1496 | 260 x 260 | ~0.1738 x ~0.1738 | | 40x | Standard | 1224 x 904 | 213 x 157 | ~0.1740 x ~0.1737 | ===== CO2 and/or O2 Control Procedure ===== * **If you require CO2 and/or O2 control**, turn the **atmosphere controller ON**. {{cytation_gas_1.png?200|}} * Confirm the **CO2 and/or O2 switch is ON**, and set to the desired percentage. {{cytation_gas_2.png?600|}} * **Open the CO2 and/or N2 tap** on the wall. {{cytation_gas_3.png?200|}} ===== Microscope Turn On Procedure ===== * Turn on the microscope using the **switch** at the **front of the system**. {{cytation_turnon_1.png?200|}} * Turn the **computer** on. {{cytation_turnon_2.png?200|}} * **Login** to Windows with your **GIMM Agendo credentials**. * Wait for the **button light** in the front to **turn green** (the system will pop out the plate drawer as well). {{cytation_turnon_3.png?200|}} * Open the **Gen 5** software. ===== Microscope Turn Off Procedure ===== * Turn off the microscope using the **switch** at the **front of the system**. {{cytation_turnon_1.png?200|}} * **Sign out** of the computer. * **If you used the gas controller** * Turn gas controller OFF {{cytation_gas_1.png?200|}} * Close all wall taps. {{cytation_gas_3.png?200|}} ---- [[resources|Back to the Equipment page]]